我建好的论坛:施家远布
Discourse 是一个开源的社区讨论平台,旨在为用户提供一个现代化、功能丰富且易于使用的论坛解决方案。它基于 Ruby on Rails 和 Ember.js 开发,支持 PostgreSQL 和 Redis,适用于桌面和移动设备。
相比传统的discuz!的论坛,最大的优点就是好看,而且discourse发展势头良好,社区活跃,因此是建设论坛首选。
主要特点
现代化设计:支持滚动式刷新,摒弃传统分页,提供流畅的用户体验。
高度可定制:支持 HTML/CSS 主题自定义、插件扩展,以及与 WordPress、Google Analytics 等第三方服务的集成。
多平台支持:提供 Android 和 iOS 应用,支持多种身份验证方式。
强大的社区功能:支持私有/公共对话、可搜索讨论、邮件通知、表情符号、徽章等。
API 支持:提供全面的 REST API 和 Webhooks,方便与其他应用集成。
安装 Discourse
参考链接:Install Discourse for development using Docker - Documentation / Developer Guides - Discourse Meta
方法1:使用 Docker 安装
1. 安装 Docker:
curl -fsSL https://download.docker.com/linux/ubuntu/gpg | sudo apt-key add -
sudo add-apt-repository "deb [arch=amd64] https://download.docker.com/linux/ubuntu $(lsb_release -cs) stable"
sudo apt-get update
sudo apt-get install -y docker-ce
2. 启动discourse docker镜像
git clone https://github.com/discourse/discourse.git
cd discourse
d/boot_dev --init
# wait while:
# - dependencies are installed,
# - the database is migrated, and
# - an admin user is created (you'll need to interact with this)
# In one terminal:
d/rails s
# And in a separate terminal
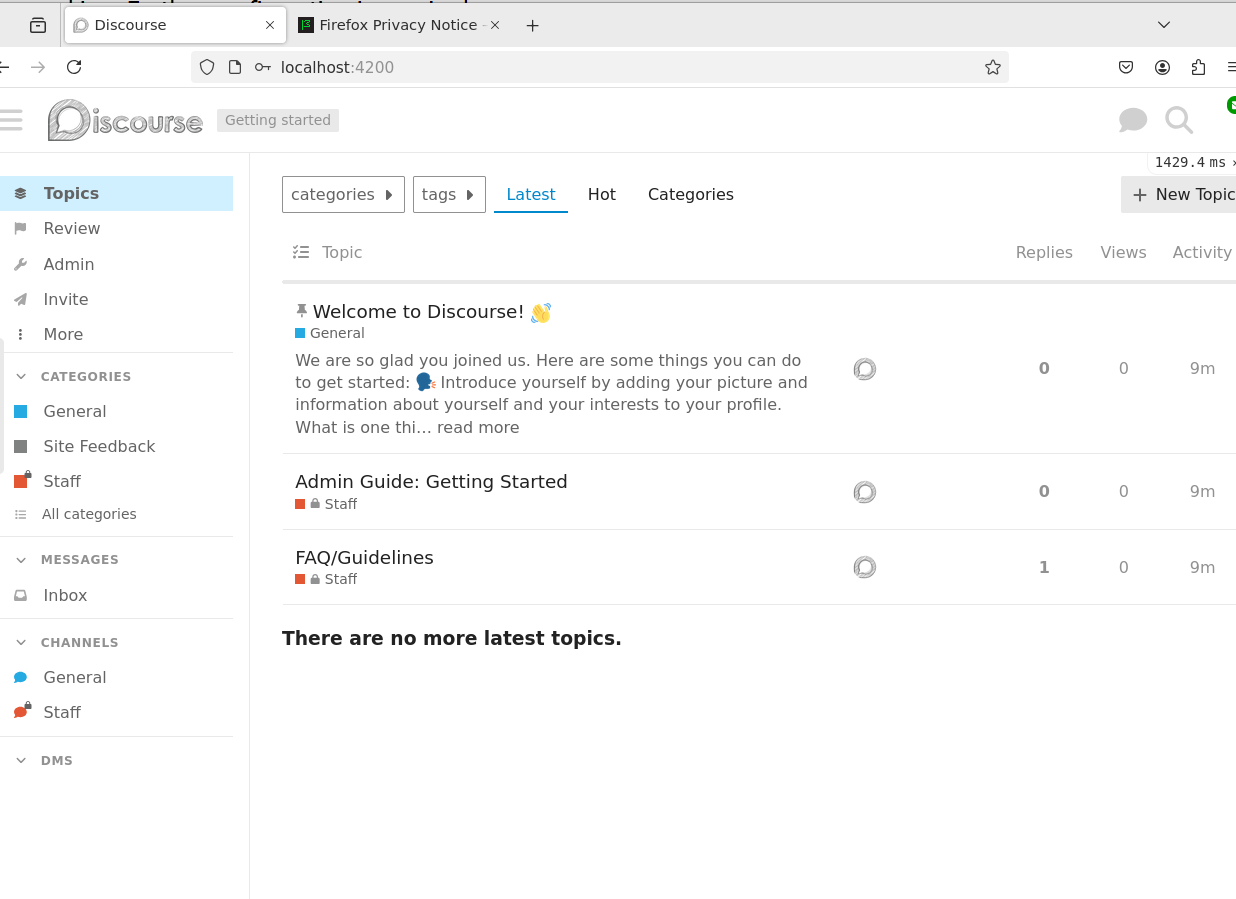
d/ember-cli成功登录:
注意事项
git下载的discourse目录要放在~/discourse
wsl中要开启代理才能下载docker
docker加速:
{
 "registry-mirrors": [

                "https://docker.1ms.run",

                "https://dockerproxy.cn",

                "https://docker.1panel.live",

                "https://k-docker.asia"

        ]
}
需要新建用户,不能用root用户:
sudo useradd pyf
sudo usermod -aG docker pyf
echo 'pyf ALL=(ALL) ALL' | sudo tee /etc/sudoers.d/pyf有些资源无法下载,可以用梯子:Elegycloud/clash-for-linux-backup: 基于Clash Core 制作的Clash For Linux备份仓库 A Clash For Linux Backup Warehouse Based on Clash Core
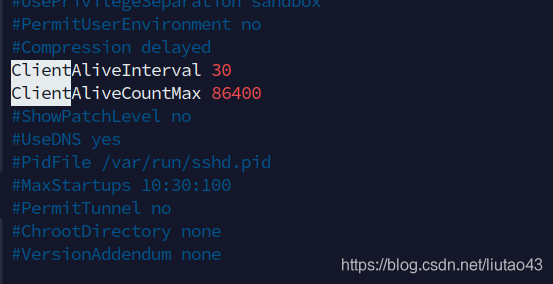
阿里云服务器ssh每隔3分钟不操作会自动断开,可以设置/etc/ssh/sshd_config:
运行discourse最少要2G内存,2C2G的服务器可能跑不起来。
wsl设置:
#放到$USER目录下
[wsl2]
networkingMode=mirrored
dnsTunneling=true # 开启 DNS Tunneling
firewall=true # 开启 Windows 防火墙
autoProxy=true
[experimental]
hostAddressLoopback=true
docker可以设置代理:
{
  "registry-mirrors": ["https://docker.1panelproxy.com"],
  "proxies": {
        "http-proxy": "http://127.0.0.1:7890",
        "https-proxy": "http://127.0.0.1:7890"
  }
}
方法2:用discourse_docker安装
方法1安装好后,出现一些莫名其妙的问题,所以现在用github的discourse_docker仓库来安装:
discourse/discourse_docker: A Docker image for Discourse
准备事项:
域名+服务器,用于安装discourse
smtp服务器,用163的smtp服务器,可以在设置中开通smtp功能
在服务器上运行代码:
cd ~
git clone https://github.com/discourse/discourse_docker
cd discourse_docker
sudo ln -s /home/$USER/discourse_docker /var/discourse # link to /var/discourse

# start install
sudo ./discourse-setup --skip-connection-test #开始生成containers/app.yml配置文件,期间要输入smtp账户密码,服务器域名等信息
#上一步没有报错完成后,开始启动docker镜像,可以修改containers/app.yml配置
sudo ./launcher rebuild app #如果没有报错,可以运行docker ps查看 discourse镜像是否已经启动
成功!

注意事项
如果用了nginx反向代理,在app.yml中需要修改端口以及去掉ssl:
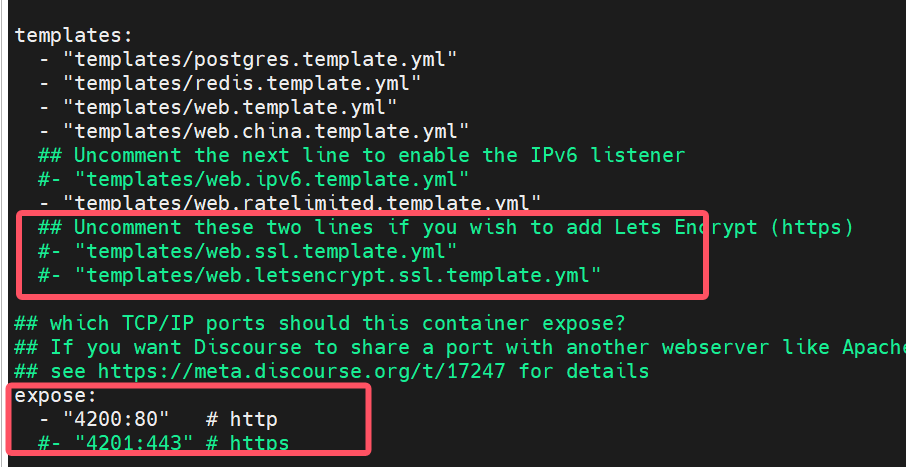
参考:Run other websites on the same machine as Discourse - Documentation / Self-Hosting - Discourse Meta
安装discourse时需要ruby资源,国内访问ruby可能有问题,需要替换镜像,参考:
国内开源镜像站点集合-镜像站列表】_163镜像站-CSDN博客
rubygems镜像_rubygems下载地址_rubygems安装教程-阿里巴巴开源镜像站
我发现用清华镜像源会出问题,因此替换成了阿里云的镜像源,最后成功。
设置SMTP服务器一定要设置对,实测QQ的smtp服务在ruby中返回莫名其妙的错误。实测使用163的邮箱没有这个问题,在app.yml中的设置是这样的:
  DISCOURSE_SMTP_ADDRESS: smtp.163.com
  DISCOURSE_SMTP_PORT: 25
  DISCOURSE_SMTP_USER_NAME: xx@163.com #去163邮箱网站申请
  DISCOURSE_SMTP_PASSWORD: "xx" #去163邮箱网站申请
  DISCOURSE_SMTP_ENABLE_START_TLS: true           # (optional, default true)
  DISCOURSE_SMTP_DOMAIN: discourse.example.com # (required by some providers)
  DISCOURSE_NOTIFICATION_EMAIL: xx@163.com
DISCOURSE_SMTP_ENABLE_STARTTLS_AUTO: true163邮箱注册:https://mail.163.com/
用ruby测试邮件系统:
#测试smtp服务器是否可连接:
openssl s_client -connect smtp.qq.com:587 -starttls smtp

#用ruby测试邮件服务:
rails console
mail = Mail.new do
  from    'xx@qq.com'
  to      'xx@qq.com'
  subject 'Test Email from Rails Console'
  body    'This is a test email sent from Rails Console.'
end

mail.delivery_method :smtp, {
  address: 'smtp.qq.com',
  port: 587,
  domain: 'discourse.example.com',
  user_name: 'xx@qq.com',
  password: 'xx',
  authentication: 'plain',
  enable_starttls_auto: true
}

mail.deliver!
修改了参数后,可以直接重新启动镜像,不需要运行launcher rebuild app (时间很长):
# 修改参数后,直接运行docker指令即可,不需要rebuild:
/usr/bin/docker run --shm-size=512m -d --restart=always -e LANG=en_US.UTF-8 -e RAILS_ENV=production -e UNICORN_WORKERS=8 -e UNICORN_SIDEKIQS=1 -e RUBY_GC_HEAP_GROWTH_MAX_SLOTS=40000 -e RUBY_GC_HEAP_INIT_SLOTS=400000 -e RUBY_GC_HEAP_OLDOBJECT_LIMIT_FACTOR=1.5 -e DISCOURSE_DB_SOCKET=/var/run/postgresql -e DISCOURSE_DB_HOST= -e DISCOURSE_DB_PORT= -e LC_ALL=en_US.UTF-8 -e LANGUAGE=en_US.UTF-8 -e DISCOURSE_HOSTNAME=xx.com -e DISCOURSE_DEVELOPER_EMAILS=xx@163.com -e DISCOURSE_SMTP_ADDRESS=smtp.163.com -e DISCOURSE_SMTP_PORT=25 -e DISCOURSE_SMTP_USER_NAME=xx@163.com -e DISCOURSE_SMTP_PASSWORD=xx-e DISCOURSE_SMTP_ENABLE_START_TLS=true -e DISCOURSE_SMTP_DOMAIN=discourse.example.com -e DISCOURSE_NOTIFICATION_EMAIL=xx@163.com -e LETSENCRYPT_ACCOUNT_EMAIL=me@example.com -h DXP4800-app -e DOCKER_HOST_IP=172.17.0.1 --name app -t -p 4200:80 -v /var/discourse/shared/standalone:/shared -v /var/discourse/shared/standalone/log/var-log:/var/log --mac-address xx local_discourse/app /sbin/boot